I have honestly been dreading picking a
square. That could be, in part, due to some busy times my way behind the
scenes...but, if I'm honest with myself it's because in picking a square my
novice status seems pretty apparent.
This square was a last minute
substitution for another square (actually a hexagon)
that just didn't lend to the quilting bee format. That being said, I'm
really happy with this little sub! It worked up quickly and was a lot of
fun. This square is also from the fresh lemons site. I really like
her fabrics and style.
Have you waited anxiously long
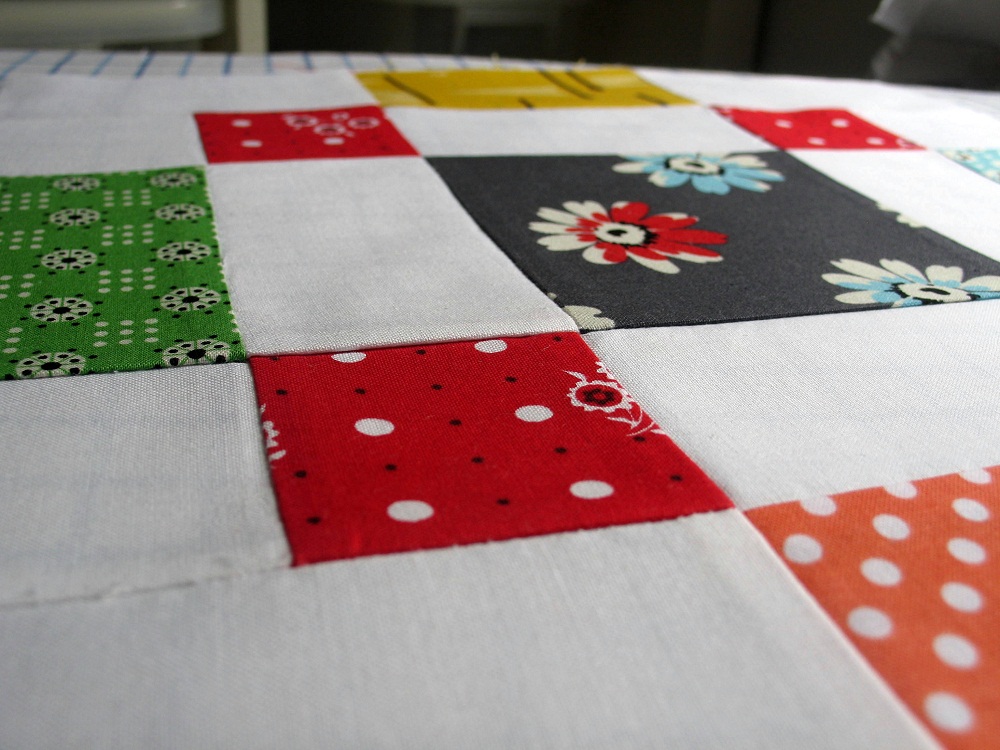
enough? Okay, here it is. (Sitting on a towel in my driveway.)
Here's the source
for your reference. Her fabrics are gorgeous and her diagrams help a
lot. I'm going to do my darnedest to do something quality-ish tutorial
wise, but she's the pro so I would recommend a look at her site.
So, here goes!
You're actually making two squares. One square (on her diagram it's called
BLOCK B) that will then be cut into
quarters (BLOCK B - QUARTERED in the diagram). Those four quarters make the four corners of the finished second square or BLOCK A (so
named on her diagram). You can see how in mine all of my four little
corner color squares are yellow polka dots. (Or little fried eggs as I'm
sad to say...) In her BLOCK A each little corner color square is
different because she made up multiple
BLOCK Bs and then used pieces of different BLOCK Bs to make her four different colored corners in
her BLOCK A. You will just make one BLOCK B like mine to be used for your BLOCK A corners.
1. Fabrics: I am not committed to
a specific color scheme with this quilt. I want the colors to be vibrant,
rich, and fairly basic. No pastels, neon, distinctly fall colors or overly
dark (maroon, emerald green, etc.) tho some navy is welcome. I
love the colors she used in her block. And I love the colors on her
pinwheel quilt that I linked to above.
I don't want certain squares to be
assigned specific color themes. I'd love for each square to have many
different colors that loosely work together. Mine, speaking in general
terms, has a yellow, orange/coral, green, blue, turquoise and gray. You
can mix and match as she and I did. I honestly feel that mine is a little
too matchy matchy. I think because my center print has lots of different
colors I subconsciously color matched a bit to that and it looks a bit too
congruent, if that makes sense. Not bad, but not my intent. I like
how hers works well together but has some dissonance.
I would love all of your 6 different
fabrics to be prints, no solids. I am not a straight modern or vintage
girl, but I prefer those two general fabric families. I think what I don't like
can be said best in the immortal words of Kristin Sharp: no Sponge Bob.
Ha. I have zero fears of that from you guys. However, I did add
some whimsy/vintage-ey prints that might lead you to think novelty
fabric. I think there's a difference...although my center U.S. piece is
borderline. I'd say 0-2 whimsy prints are the range for the square.
If you look at the two fresh lemons
quilts and follow their eclectic and varied color and print combos/ideas I'll
love it. I'd say just pick some stash fabrics that are your favorites
(hee) and see if they'd make a nice family on your square. The nice
thing is that the pieces for the most part are small, so even a hefty scrap is
plenty.
Also, if you could use KONA brand 100% cotton for the white that would be
great. I am totally happy to provide it to all of you. Just let me
know if you need it and I'll get it right out. And if you have white of a
different brand, just let me send you the Kona for continuity's sake throughout
the quilt. (:
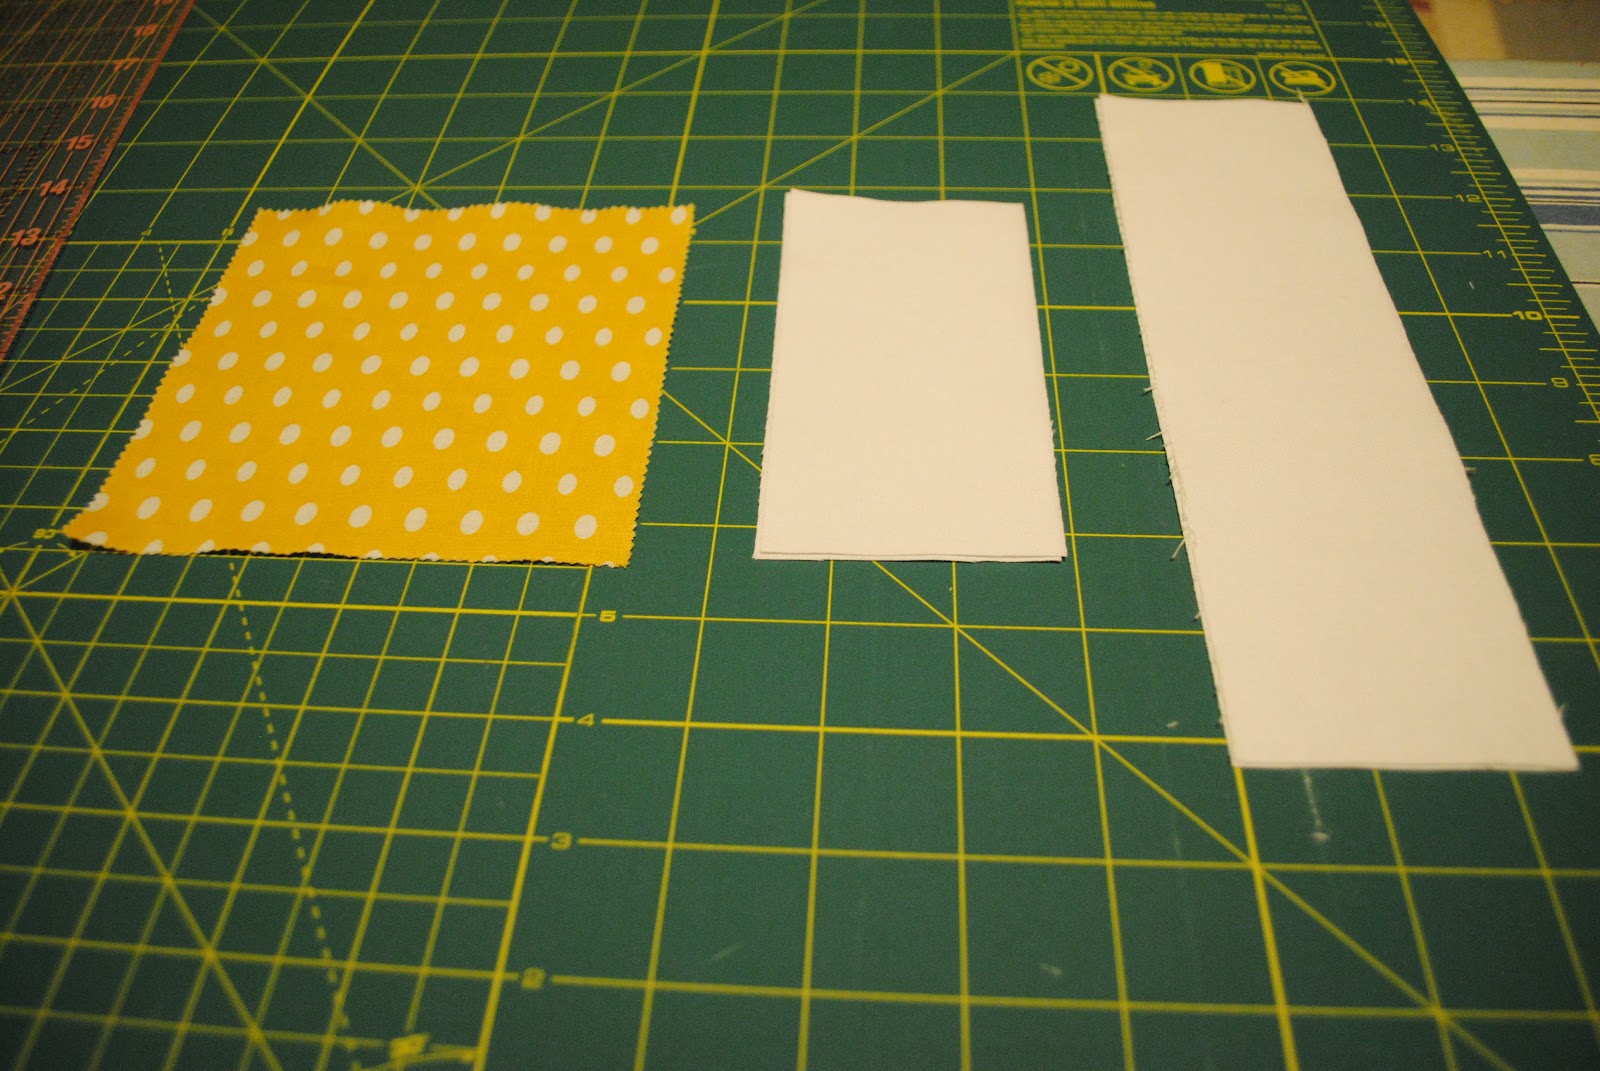
2. BLOCK B: You will need
to cut out two 2.5 x 5 strips of white, two 2.5 x 9 strips of white, and one 5
x 5 print.
Then just sew the two 2.5 x 5 strips to
either side of the 5 x 5 and press (seams together towards the print).
Next sew the two 2.5 x 9 strips to the
other sides and press seams toward the print.
I forgot to take a finished picture of
BLOCK B, but I did take a picture of it after I quartered it. Cut it so
that each quarter is 4.5 x 4.5.
See? Fried eggs! What was I
thinking! I didn't even notice until it was done! I debated between this yellow and a lighter one. I think
I might have chosen unwisely. But I'm sure you guys have realized my
inability to not see flaws in what I quilt. Oh to have the gift of
unseeing!
Okay, back to the job.
3. BLOCK A: You will need to cut
out four 2.5 x 4.5 strips of white, four 2.5 x 4.5 strips of four differing
prints, and one 4.5 x 4.5 print.
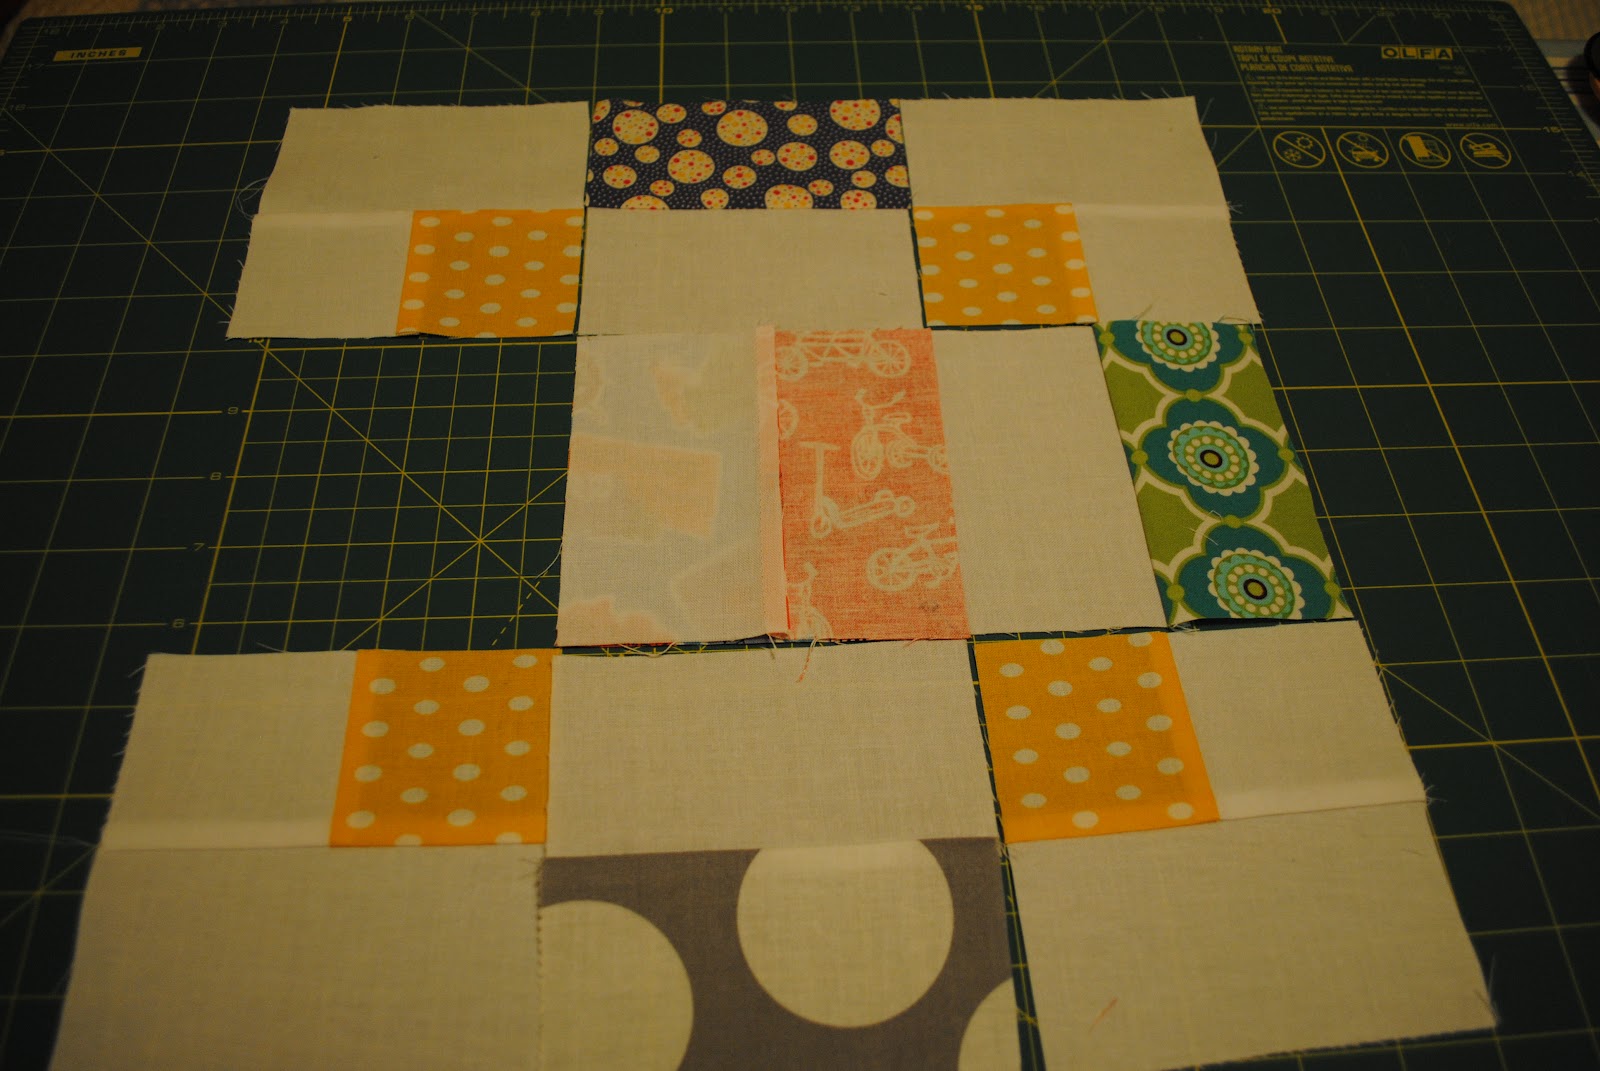
Go ahead and lay them out in
position. If you want to you can put the finished BLOCK B – QUARTERED corners
on to make sure you're liking the colors together and general layout.
Then you just sort of start
sewing! I began sewing all four of the 2.5 x 4.5 strip pairs
together. For the most part I'd press the seams together towards the prints.
There will be one point where you won't, I'll show that later.
Once you've done all four pairs
you can lay it out to get the final look. You can see I swapped two
positions at this point. Despite the whole making-two-squares-thing the
finished product came together so fast and was really gratifying!
Then just sew the horizontal rows. I started with the middle row.
And I pressed those seams toward the
print.
For the other two rows you'll want to
sew together as well, but press the seams toward the white (as pictured below)
so the pressed seams nestle together nicely for sewing the rows together so
your points match easily.
Once you've sewn each row you just need
to sew the three rows together! Hopefully those alternately pressed seams
will help with your points.
And then, voila! Press and such and you're done!
Thanks for your patience with the dark pictures and generally amateurish
tutorial. If you see a mistake I've made or have any questions feel free
to comment here or to email me. And again, the diagram and information here
are invaluable.
I appreciate you girls. It's been
a welcome challenge to join this group and see your beautiful ideas, projects,
fabrics, styles, etc. Also, your genuine kindness and enthusiasm have
been a joy. I hope you enjoy making this square! Thanks in advance!
(Also, sorry the spacing is weird. I started this in word and blogger's been hatin' on me about that ever since.)