Sunday, December 21, 2014

merry christmas to me and thank you to you!


Several days ago I had the idea that I ought to give myself a gift for Christmas and finish my 12squared 2014 quilt.  Just seconds ago I sewed the last stitch on the binding.  I absolutely love it!  Thank you to each of you for helping me with this quilt.  It was a lot of work but we did it!  As I topstitched I saw fabrics that I hadn't ever noticed before- it made topstitching fun! :)  Now onto 2015!!

Monday, November 24, 2014

patriotic star for mardie

You almost made it too easy for us, Mardie!  It was fun to make and I had "You're a Grand Old Flag" playing in my mind.  It's going in the mail TODAY!
Below is a super quick baby quilt I made for a friend with fabrics I had on hand.


Sunday, November 23, 2014

Beautiful blocks for beautiful ladies

Okay, first I have to say that joining this quilting club/bee/group was the most fun thing I have done for myself in a long time.  Not even considering the fun of learning new blocks, or having a "reason" to add to my stash, the joy of getting something so lovely as a pile of fabric in the mail is such a wonderful addition to a normal, blah day.  So when Mardie's envelope arrived with all the fabric for her patriotic star, it was just the inspiration I needed to set aside my cleaning and get cozy with my machine.  But I felt guilty working on her block, when I still needed to finish two other blocks, so I worked on them in order, even if they were technically all completed on the same day! :)

First up is Cami's fun, scrappy block.  I really love how the craziness of all the different fabrics is toned down by the borders of white.  True, completely scrappy quilts are too much for me, but I love, love, love the look of this, and have now decided to make one for myself.  Someday, you know, when I finished all the other half-done quilts in my closet.  Ahem.

Next up was the delightfully uncomplicated modern cross for Kristin.  It went together so quickly, I made two.
And of course, I HAD to make it in Switzerland colors! :)
Finally, the beautiful patriotic star for Mardie.  This was just tricky enough that I had to pull out some stitches.  Apparently, relying on my memory for which way the stripes were supposed to go was a bad call. I kept the tutorial up on my computer, right next to my sewing machine after that.  And everything went together perfectly.  I wish we could sew the other blocks as well, just so I could learn something new.


Monday, November 10, 2014

Patriotic "Twin Stars" for Mardie

I have been wanting to have a patriotic themed quilt. 
With a supply of red, white and blue chosen to make into stars, I am ready!

First of all, I will be sending you ALL of the fabric that you will need. (2 1/2" strips or squares.)
The final square is 8 /2" to 9". Please do not trim it.
ALL seams are 1/4". Some seams are pressed to the dark, some pressed open.

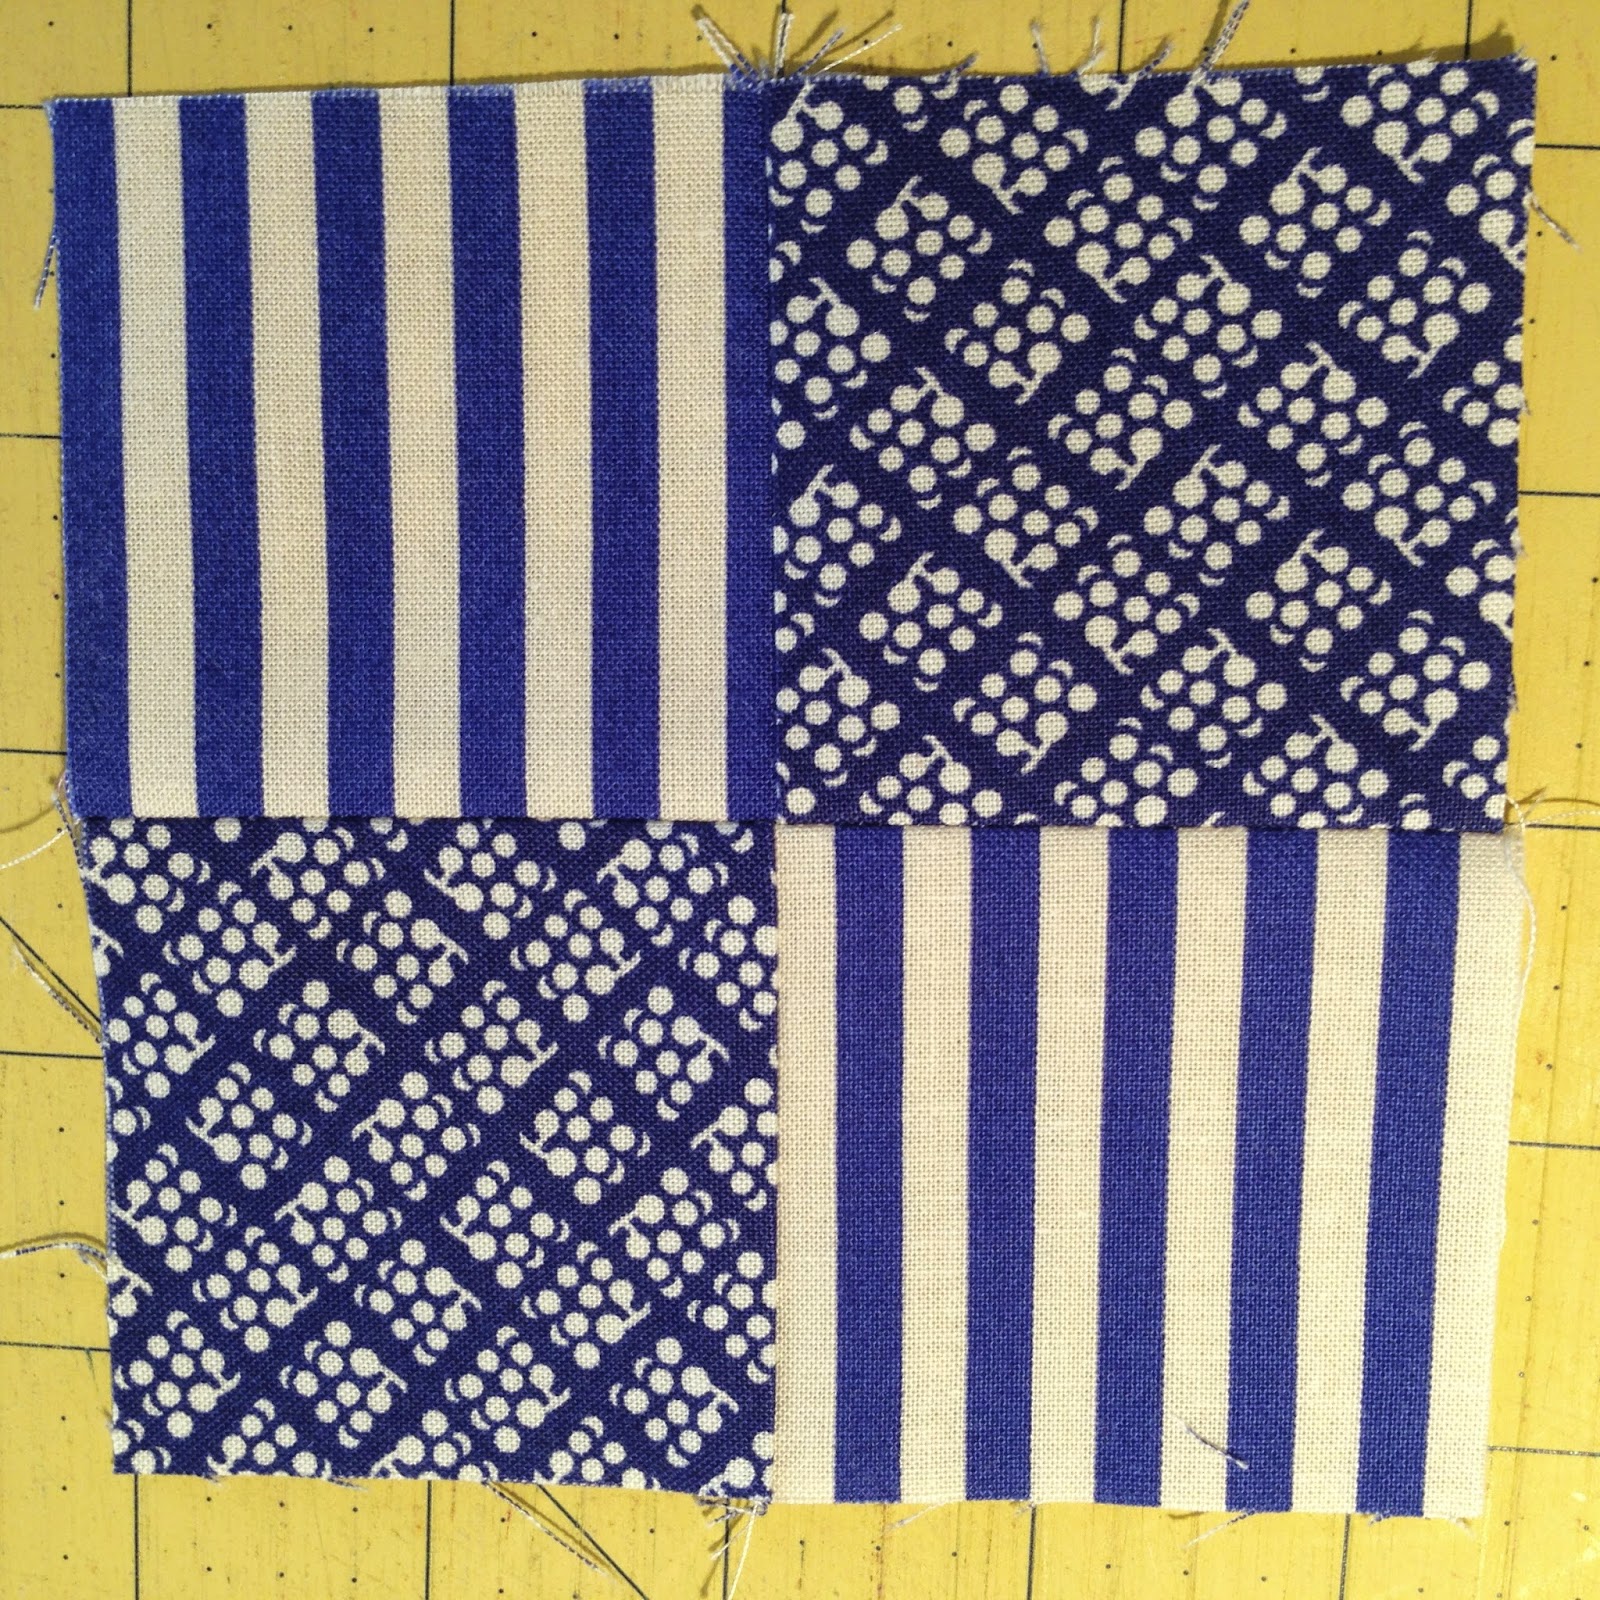
Here are the two squares that will make up the quilt. You can see how the blues will work with the reds.


We will be stitching the square on the LEFT: THE STAR!

Your packet of fabric contains the following:
2  2 1/2" squares of blue and white stripe
2  2 1/2" squares of blue and white floral
1 strip of 2 1/2" wide cream
1 strip (or squares) of 2 1/2" Red floral
1 strip (or squares) of 2 1/2" Blue paisley

A. Sew four patch unit:
You will need TWO blue & white striped 2 1/2" squares and TWO blue & white floral 2 1/2" squares.
Sew squares and press to the dark blue. Then sew rectangles and press seam open.

PLEASE ORIENT STRIPES AND FLOWERS ACCORDING TO THE EXAMPLE!


B. Sew 4 sets of flying geese:
Cut the cream strip of fabric into Four  4 1/2" X 2 1/2" rectangles.
You will need Eight 2 1/2" squares of the blue paisley.
Draw a line from corner to corner of the blue paisley squares.
Place 1 blue square in the corner of the cream rectangle. Sew on the drawn line.
Press to the dark. Trim 1/4". Press again.

Place the second blue paisley square in the opposite corner of the cream rectangle.
Sew, press and trim as before.


C. Assembling the star:
You will need Four 2 1/2" squares of the red with flowers fabric.
Sew the Red squares  to the left and right ends of the top flying geese piece. Then TWO to the bottom flying geese.

PLEASE ORIENT STRIPES AND FLOWERS ACCORDING TO THE EXAMPLE!

 Sew the three sections together. Press seams open. 

 Ta Da!

Just in time for a patriotic Christmas!

Hope you enjoy this.
Thanks, Mardie


Thursday, November 6, 2014

modern crosses for Kristin

Here are some crosses for you, Kristin.  So fun!


emily

Kristin's Modern Cross

You were right, Kristin. This was quick and easy. I think your quilt will turn out great!

 Here is my Thanksgiving pillow. I LOVE this Spider Web square!
Next... Christmas?

 I will have the November tutorial soon. I have struggled with it.  
(hmmm, maybe it would be done if I weren't making pillows?)
Mardie

Tuesday, November 4, 2014

any more out there?


Hello Polaroid Swappers!
Many of us have received some really fun squares from becca, emily, liz, mardie and me.  We'd love to know if we can expect any more.  Below you'll see a list of the gals who said they'd like to participate when we first started.  Melissa is not in our group but saw our blog and wanted to participate.  I will see if I can contact her directly.  If you could let us know if you're squares will be coming that'd be great!  Thanks!!
participants:
becca
camie
cindy
emily
kristin
liz
mardie
melissa

Thursday, October 23, 2014

modern crosses, fingers crossed


I hope you like them Kristin!   I can't send them right away because once I was in better lighting I noticed that the white square in the middle of the red block is not kona white like all the other white fabrics I used.  I mistakenly grabbed another white in my scraps and I can tell the difference so I know you will too.  I need to buy some more and do a little unpicking before I send it your way. :)  Also, I made you a block using chevron stripes and they are all going the same direction except for the little rectangles on the sides.  I wasn't sure if that would bother you or not so I didn't take a photo (again, I ran out of that fabric and I didn't see it the last time I was at the store!)  Let me know if you want me to send it.  It's the same colors as the blue polka dot.

Monday, October 20, 2014

Modern Crosses From Hot Springs

I'm still not sure about these fabrics, but they are yours nonetheless, K-Cakes!
Such a quick and easy block.  The perfect amount of work for October. :)


xo,
becca

Friday, October 3, 2014

Happy Halloween (and "tiny scrappy squares" square for Cami)

I forgot to post Cami's Scrappy Square: I liked sewing this one.

(Not a great picture!) 

I have had a great time adding to my Halloween treasures. I loved Jen Deschamps' Spiderweb square. This year I decided to make one with Halloween selvages. I loved how it turned out with the black background. Thanks, Jen!
 Then I finished a Halloween quilt! I LOVE the colors and patterns. 
(Nothing like getting things done when you have some extra time at home.)

My daughter-in-law, Maria Mae has been working on a Butterfly quilt (with butterfly squares from the ladies in "Trading Pieces") for her mom. We got together and finished the sashing and border and then I quilted it and bound it. I love her mom!
I LOVE working with fabric! 

Thursday, October 2, 2014

October: a Modern Cross

Are y'all ready?? It's so easy, and quick! Perfect for the month when (some of us) are feverishly working on homemade Halloween masterpieces...
This block consists of 9 smaller blocks, 4 of which are pieced together.

You'll need: (4) 5" squares of the fabric of your choosing
(1) 5" square of Kona White
(4) 2.75" x 5" rectangles of the same fabric of your choosing
(4) 2.75" x 5" rectangles of Kona white

Fabric: we'll be using Kona white to make the cross, and one more fabric- anything but pink. It's okay if there is pink in the print as long as it's not the superstar. 

So here goes the tutorial-
layout your pieces like this ^ ^ ^
then like this ^ ^ ^
attach your rectangle's, right sides together and press away from the white

then attach all your small squares to make one big square. just make sure all of the white is in the center :)

Your block should finish at 14".

What do you think? Too vague? Not detailed enough? I'm happy to answer questions. Also, I'd be happy to provide the Kona white if you need it!

Thanks friends. I'm excited.