I went through way too many other squares
and finally settle on one that I felt looked like me!
(I'll take a better picture)
and finally settle on one that I felt looked like me!
(I'll take a better picture)
This square is going to be patterned pieced, please don't hate me!
First the dirty business:
Colors: cool (vs warm) shades of GREEN / Kona white
I am going to send you paint chips to match the green and Kona White.
I love a lot of quirky fabric.
I do not love watermarked fabric, and super traditional...like country floral, 80's stuff
In advance, there are a ton of directions, just in case you need them.
Lets Begin!
Take any 8 x 10 paper and mark a 5" line.
Rotate paper. Align with edge, mark 5" and cut off extra.
Rotate paper again, and cut at 5" line.
Now there are two 5" squares.
Back to the ruler.
Mark lightly with a pencil 2.5" from the top and sides
Finding the center.
Like so.
From that center line draw TWO lines EQUAL distance from the center.
The lines can be any distance from the center.
Mark dark so that you can see from the other side.
Turn the square and mark TWO more lines, again EQUAL distance from the center.
I marked mine with a dash.
Find the top and number the sections like so.
This is the order in which to sew the white on.
Starting with piece number one.
Find the fabric you want to use.
Make sure there is ample room.
This is where pattern piecing can get frustrating,
thinking there is enough fabric
and then running short.
Lay the white fabric down.
Place the green fabric on top, right side down.
(I took this picture wrong so I had to redo, hence the red fabric)
Lay the 5" paper on top of the fabric.
Lines facing up.
I held mine up to the light to make sure I had about 1/4" seem allowance.
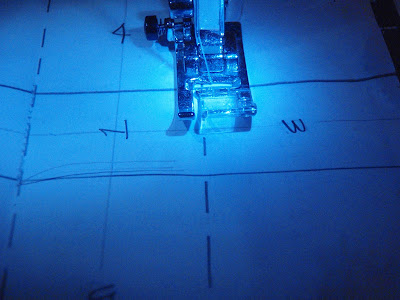
Sew on top of the line, starting where the two lines meet.
BACKSPACE at the beginning and end of stitch.
It helps the stitch stay when removing the paper.
Fold back paper at the line just stitched
and trim off extra fabric, leaving 1/4".
NOTE:
This is where I have messed up a lot!
Be extra care full and don't cut off all of the seam allowance!
Iron Stitch.
(I don't know why I do this but they say it secures the stitch?!)
Turn paper over and iron open, like so.
Next place white fabric over green for piece number 3.
Sew along line, just as before,
starting at the intersection.
Repeat FOLD, TRIM, SECURE STITCH, IRON OPEN.
This time, piece four, as before, align white fabric on top.
But start at edge and stitch all the way across.
Repeat FOLD, TRIM, SECURE STITCH, IRON OPEN.
Repeat with the final piece.
Stitching from side to side.
Final FOLD, TRIM, SECURE STITCH, IRON OPEN.
Use the paper piece to trim off excess fabric.
Gently remove paper.
Like this...
Iron...then make 8 more.
Sew all 9 squares together to make one.
The final square is about 15".
(I hope that is okay)
DO NOT TRIM SQUARE DOWN.
IMPORTANT BITS:
Green Fabric should be less than @ 50% of square.
or in other words, more white than green fabric.
Stick to only FOUR corned shapes.
More or less centered.
The fabric should be green.
However, I understand there is some cross over colors...
just make sure when looking at it, it says green or will in the bigger picture.
I am sending paint chips and Kona white to you tomorrow, Monday.
Many thanks!!!
Any questions just ask.
To the few I promised fabric to back in Feb.(?),
It will be sharing a ride with the Kona & chips.
Sorry it has taken only forever!
XO
Teriney


you've officially intimidated me:) i'm excited though. i can't wait to see how it turns out. just want to be clear- we're supposed to follow your tutorial for one of the squares, but improve the other 8, according to your guidelines?
ReplyDeleteKristin,
ReplyDeleteYou can improve all 9, according to my guideliness. But if you want to copy the tutorial to 'get the hang of it' feel free.
It is less complicated than it seems. After the first one, it'll be 'old hat.'
Oh wow! Beautiful block but yes- intimidating is the right word! So how did you get diagonal lines in some? I don't do so well with improvising. : )
ReplyDeleteI had a chance to sit down and read the entire tutorial; I think I can do it! I just wonder if there is a reason for all the steps to get two 5-inch squares. Can I just cut 9 5-inch squares out of white paper without all the rotating and cutting off? Maybe I missed the boat and there is a reason...
ReplyDeleteno reason Camie. I just put every petty step just in case some one wants/needs it. :)
ReplyDeletevery cool. I'm excited to get the chips so I can go green shopping.
ReplyDeletein your tutorial, is the floral considered "green"? (the one in the right middle square) i know you said you're okay with some crossover, just wondering HOW green you want it!
ReplyDeleteI was kind of in a rush, I would have cut more of the red and blue.
ReplyDelete*cut out more of the red and blue.
ReplyDeleteyour chips came today, as well as your scraps, THANK YOU!!!
ReplyDelete