I was pretty sure that I wanted to do a block from my Modern Log Cabin book, but then I made it and changed my mind. After a morning's worth of surfing I came across THIS one, and instantly fell in love.
It reminds me of Jen's Spiderwebs because it uses the same foundation piecing, which I really enjoy.
You can check out the link for her tutorial, but it isn't very specific, so here is my version.
P.S.- I stink at tutorials, so forgive me.
Without further ado, here it is!
It will look absolutely perfect on my couch....
Everyone will be getting a 14.5" square of Kona White.
You will need to cut it into 4 smaller squares, which should measure 7.25" each.
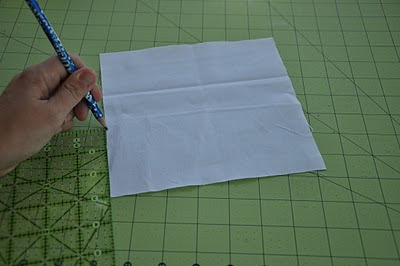
Pick a corner. Now measure 1.5" on each side of the corner and make a small dot with a pencil. (two small dots total)
On the corner diagonal to where you made the marks, you will make two more marks- this time 3" out from the corner, on each side.
Then, connect the dots, one 1.5" mark to one 3" mark. Do that on both sides.
It should look like this.
Once you have two lines, you will connect the 3" marks with a line.
Now it should look like this.
Take your first selvage, right sides together stitch the unfinished or print edge to one of the longer lines.
Press it open.
Next, get another selvage strip. Right sides together, line up the unfinished edge of selvage two with finished edge of selvage one and stitch.
Now, keep adding until the corners are covered.
Once one side is complete, do the other long side.
The back should look like this.
Do the corner last, the same as the longer sides.
Here is what it'll look like...
Now, turn it over and square it up.
Oh so gratifying!!!
Now do it three more times. Join the four squares to complete the windmill shape like my first picture using a 1/4" seam allowance.
A few specifics:
*I left a 1/2 of print above my selvages when I cut them, just to add a little flavor.
*When I attached each selvage I used 1/8" seam allowance instead of 1/4" to allow for more visibility with the wording, etc.
*If you don't have enough selvages to complete the square, I don't mind if you do a few strips of just fabric, but not too many of those. I want it to look wordy...
*I also want it to look colorful, so try to use a variety of prints
*If you need selvages I have some extras and would be happy to round some up for you, just let me know
*please don't trim the edges once you've completed the square:)
Hugs and kisses to you all, I can't wait to see your fabulous work!


those extra selvages you have? could you send some my way? they're the first thing i throw away when cutting... now i know to save!
ReplyDeleteVERY COOL!
ReplyDeleteare the first selvages you attach to the white square 1/8" seams as well? does my question make sense?
ReplyDeletevery cool. can't wait to start it. are you going to mail me kona or am i gonna get to see you soon?
ReplyDeleteLiz, I think I did both. Just do whatever you're comfortable with!
ReplyDeleteBex, I hope to hand deliver it... what do you have this week?
Liz- both meaning 1/4 and 1/8.
ReplyDeleteps- i have enough selvages? i have enough. :) also, some of mine have dots along the words. is that okay too kristin??
ReplyDeleteoooh! so lovely. I hope I have enough selvages!
ReplyDeleteHey girls- check your fat quarters too...sometimes you will find a selvage. I'm going to run by Stitchin Post tomorrow to see if they have any extras. Jennie, I'm glad you found some. Some of mine have the little holes, too. I'm happy to send some up your way of you need more, just let me know.
ReplyDeletejust curious-what's the sanrio sticker for? :)
ReplyDeletejust noticed your question, liz. it's my 1/2 inch marker...:)
ReplyDelete